Please note : This help page is not for the latest version of Enterprise Architect. The latest help can be found here.
Structured Specification Toolbar
In developing a Structured Specification, you can perform a range of operations using the icons on the Structured Specification toolbar.
Access On a diagram or in the Project Browser, right-click on element and select:
Properties > Scenarios > Structured Specification or
Properties Page | Scenarios > Structured Specification
Toolbar options
Icon |
Action |
See also |
||||
|---|---|---|---|---|---|---|
|
Click on this icon to save changes to the scenario specification.
|
|
||||
|
Click on this icon to return to the basic path specification (if another specification is currently displayed).
|
|
||||
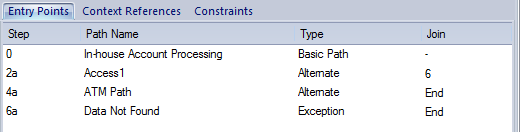
(Enabled when the basic path is displayed - you cannot add an alternate path to another alternate path or an exception path.) Click on this icon to create a branch from the selected step to an alternate path scenario; select the path from the displayed list. If the appropriate scenario does not yet exist, double-click on the new path line and type the scenario name, then click off the line and back on to it. Click on the OK button.
|
|
|||||
(Only enabled when the basic path is displayed - you cannot add an exception path to another exception path or an alternate path.) Click on this icon to create a branch from the selected step to an exception path scenario - select the path from the displayed list. If the appropriate scenario does not yet exist, double-click on the new path line and type the scenario name, then click off the line and back on to it. Click on the OK button.
|
|
|||||
|
Click on this icon to display the Manage Uses Context List dialog, which you use to set the Uses column entries to linked context reference lists. |
Structured Specification Selected Text Context Menu
|
||||
|
Click on this icon to move the currently-selected step one place up (including any new step ... entry).
|
|
||||
|
Click on this icon to move the currently-selected step one place down (including any new step ... entry).
|
|
||||
|
Click on this icon to display a list of diagrams that you can generate from the scenario; click on the type of diagram that you want to generate.
|
|||||
|
Click on this icon to display a list of Test Suites and Test Cases you can generate, based on this Use Case scenario. Click on the test structure you want to generate.
|
|||||
|
Click on this icon to delete the selected step from the scenario.
|
|
||||
|
Click on this icon to display the Help topic for this tab.
|
|
Learn more


